
Kites hold a unique space in Afghan history: we have been flying them in Afghanistan for more than 800 years. For me, the meaning of kites is about our culture, laughter, creativity and freedom. But the Taliban banned kite flying when they were in power before – as well as music, dance, theatre, and many other activities that brought joy to an otherwise hard way of life.
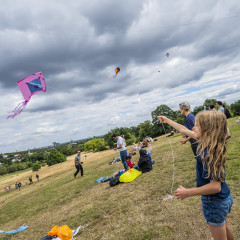
Kite flying in Afghanistan can be a sport, a picnic, or a gathering of friends. Normally, at this time of year, the skies of Afghanistan are full of kites. But with the Taliban back in power, our skies are now empty. On 20th August, one year on from the fall of Afghanistan, I’m proud to be in the Good Chance team that is launching Fly With Me, a huge festival of solidarity that will be full of Afghan kite flying, music, poetry, and dance. It is giving people who have suffered deeply inside and outside of Afghanistan something to look forward to.
The festival is happening across more than 30 locations across the UK and Europe, and it’s open to everyone. By bringing people together, and celebrating such a beautiful Afghan tradition, we will send a message of hope and comfort to Afghan people across the world. As an Afghan myself, the prospect of gathering with friends and family and feeling free to celebrate our culture - it is a real blessing.
If you want to get involved, you can join us at a Fly With Me event anywhere they’re happening around the country, or make your own kite at home. You can watch our video here, or follow my simple guide on how to make your own Afghan kite.
1. Making the frame
Take three bamboo skewers and tape the pointed ends together – this makes your ‘stretcher’. Do the same with two bamboo skewers to make your ‘spine’. Do the same with two more skewers, using plenty of tape (wrap it round the bamboo multiple times!) to fasten the sticks to each other.
Tie a polyester thread to each end of your stretcher, making sure you bend it so that it becomes a completely symmetrical half circle (not a wonky half circle!). This will help with your kite’s balance.
2. Making the sail
Cut your tissue paper and make a square. When cutting your tissue paper make sure the square is 55cm from corner to corner from the head (top) of the kite to the bottom. This is the same length as the spine, so will make sure the spine can fit perfectly from top to bottom.
Trim off any further excess tissue paper at the bottom of the kite by folding a line from the bottom of the spine to the edge of the Stretcher, on both sides of the sail. This will mean you don’t have any tissue paper flapping around! When you stick down your spine, make sure it is exactly in the centre of your sail.
Make sure your square is completely even. If it’s aligned slightly to the left or right, this will make your kite imbalanced. You can achieve this by folding your square in half when you trim it down, so it is completely even on both sides.
3 – Decorating the kite.
The best bit! Flip the kite over and decorate the sail however you like. Add colour, drawings and messages of love and hope, whatever comes to your mind. Add long strips and shapes to the bottom to make a fancy tail.
The loop that is attaching your long ball of string to the bridle string may be too high up or too low down. Unloop it and re-tie it – for best balance, the loop should be just above the middle of the bridle string, slightly towards the head of the kite. Or there may be a hole in your kite! If there is, find it and patch the hole up with tissue paper.
4 - Bridling the kite
Make two holes on each side of the bamboo sticks where the stretcher and the spine meet. The second set of holes should be about two-thirds of the way down the spine. Then cut a half metre piece of string to make your bridle. Make sure the piece of string you cut for your bridle is the same length or a little longer than your kite’s wingspan.
5 – Fly your kite
You will need a partner. Stand with your back to the wind. Feel the thread in your hands. Have your partner stand 5 metres away from you and releases the kite. At the same time, pull it toward you, and watch it fly.
For more top tips on how to make a kite, read our kite-making instructions, and watch Sanjar’s YouTube kite-making tutorial to help you make a kite that will soar through the skies!


0 Comments