
What is an artist workshop?
We love helping young people explore the arts and creative careers. That's why we're hosting short and simple Artist Workshops here on Voice. In this series, you'll be able to learn more about innovative artists in the creative industries and take a deep-dive into different art forms.
In this workshop, we're joined by Annete Sagal, a collage artist, art therapist, art curator and founder of Kyiv Collage Collective. Below is a short video where you can find out more about her creative career journey. You can then participate in a straightforward 5-step guide to creating your own style identity.
We hope you enjoy!
Q&A with Annete Sagal: how can I get into collage?
Check out the video below to find out about Annete's creative career. We asked:
- What’s your artform and when did you first get interested in it?
- What steps did you take to turn your interest/hobby into an arts career?
- What has been the most challenging part?
- What part have you found unexpectedly enjoyable?
- What advice would you give to someone who wants to pursue a similar arts career?
How to collage in seven steps
Annete Sagal is a multidisciplinary artist and certified art therapist and art curator who was born in Kyiv, Ukraine. She is a member of the NGO "Ukrainian Art Therapy Association". Her main art medium is collage. She also experiments with analogue photography, writes poems, lyrics, articles, DJs. She publishes all her works in her own project THE MOMENT. Annete is founder of the first Ukrainian international community of collagists KYIV COLLAGE COLLECTIVE and educational project KYIV COLLAGE SCHOOL and is co-founder of the CUTOUT COLLAGE ART PROJECT.
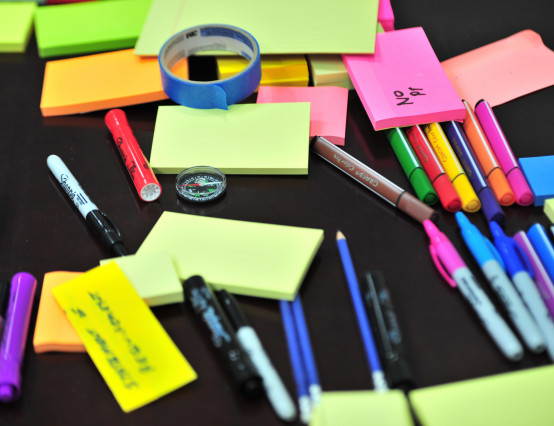
Step 1 – prepare your workspace
Collage is a great art technique that literally anyone can use! To begin you will need paper, glue and scissors.
Source material: Look for things you want to cut. It can be a magazine, an old book, postcards or coloured paper.
Glue: I recommend using glue sticks rather than PVA because it’s less messy. You can also try double sided scotch tape instead.
Scissors: Use sharp scissors for a better cut.
Advanced option: For a better detailed cut I use an Exacto knife (scalpel) and a cutting mat.
Step 2 – look for images
For some people (like myself) deciding on the topic of the artwork can be intimidating. That’s why I love collage! If you don’t know what you want to create, simply start flipping through your magazine/book to collect images and words that resonate with you.
Step 3 – cut & tear
Look at your images and start to cut them. Also you can try tearing the paper by hand – it creates a nice volume. Cut or tear shapes from coloured paper.
Step 4 – base & composition
Choose the base on which you are going to make a collage. This can be plain white or coloured paper. For the base use thick paper (like watercolour paper), this way it won’t go wavy when you’ll start to glue. The base can also be a magazine page. To start, use a regular A4 size and then you can move to bigger formats. Lay down all the images that you collected and start making a composition (don’t use glue yet!). Move things around until you find a match.
Beginners tip: Try to be minimalistic. Don’t use more than five elements. Save some cutouts for the next collage.
Step 5 – time to glue
Now that you are satisfied with the composition it is time to glue it all together. To remember where you put each piece you can take a photo of it or mark the spot with pencil underneath a cutout.
A tip for less mess: Use a backing paper when you glue so your table doesn’t get sticky. It can be a regular printer paper or magazine page that you don’t need. Put your cutout on a backing paper and start smearing glue on it. Carefully take your cutout by the edges and stick it to your collage base. Now glue piece by piece.
Step 6 – finish and reflect
Now that you have finished your collage, take a look at it. If you freestyle without any topic in mind, look and reflect on what came out. What did your inner artist wanted to say? What title will you give to this collage? Write a date, title and a description on the other side. Or you can also leave it untitled as is.
Step 7 – post your artwork (optional)
If you want your artwork to be seen – it’s time to make a post. Take a picture of a collage with a good lighting (or use a scanner): whole image and close-up details. Post it and tag collage collectives – these are the pages that repost artworks and you can meet a community of fellow collagists.
For example, follow @kyivcollage and use hashtags #kyivcollage #kyivcollagecollective. Look for the collage collective in your country like @londoncollage.collective, @pariscollagecollective, @brooklyncollagecollective.
Challenges: There are plenty of creative challenges that you can participate in. For example, @februllage is an international collage challenge happening every February. The organisers give a prompt for each day of February and people all around the world make art on that topic.
Learn more!
I invite you to join my online art therapy sessions where I will help you discover your creativity and share more useful tips on how to collage like a pro! To schedule a session, please message me on Instagram @xxthemoment or via email: [email protected].


0 Comments