When one thinks of Christmas, cards and wrapping are inevitable, with season's greetings to wish, and presents to wrap, these two things are synonymous with the big day. Here, I show you a few easy ways to recycle, create, and excite with Christmas accessories.
Card 1:
The first type of card is very creative and easy to make, recycling old ones to form an original design. To do this, you will need a collection of old cards, some colourful paper, glue, plain card and scissors. Once you get going, the premise is very, primarily the task at hand is to cut up your old cards, arranging and sticking them into an aesthetically pleasing, festive design on the plain card you have. Some extra touches you may wish to add is glitter, ribbon, or even stamp them, (if you have a rubber stamp), with something like 'lovingly hand made'. You can find rubber stamps like this in most craft shops or online.
Card 2:
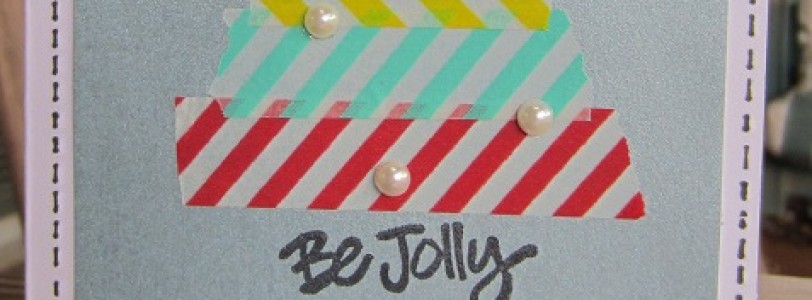
This card is a bit more complicated, but produces a fantastic effect. It's a Christmas tree card, in which layers of tissue paper are stitched across the centre fold of a card to create a 3D effect. To achieve this, you will need: green tissue paper; thread and a needle, (or a sewing machine); plain card; glue; and some ribbon. Firstly, fold the card in half, to make a card shape, then, fold in half several layers of green tissue paper and cut into a Christmas tree shape. Glue the outside layers of the tissue paper to each side of the centre fold of the card and sew down the middle. Finally, glue the ribbon down the outside of the card and glue an extra plain tree shape to the outside of the card.
Card 3:
A simple potato print can create an exceptionally crisp, clean, and modern looking design. For this type of card, you will need a potato; a sharp knife; some acrylic paint in colours of your choice; some plain card; a pen; and some ribbon. This type of design requires great care to be taken, especially when cutting the potato. To start, cut a potato in half, and then draw a design onto your vegetable, for example a Christmas tree, or a square for a present shape. Then, cut away the outside of the potato to leave your design in relief, (standing up out of the body of the potato). Next, paint the relief section of your potato with acrylic paint, and press firmly onto your plain card. To create more detail, cut away further sections into your potato and repaint with different colours. Alternatively, stick ribbon or glitter onto your dry prints to add depth, for example cut the ribbon to resemble a ribbon on a present, or tinsel on the tree. When dry, fold the card and write inside!
Wrapping:
Much like the third card, this also requires a potato, but instead uses plain white or brown paper to print upon. Use the technique outlined above to print your paper, following a repeat pattern, or randomly. Leave to dry and wrap your presents.
If you've given any of these a go, or have any further questions, let me know in the comments!
Photo: Cynthia B


0 Comments