
The lighting of a shot can really make a difference, and bad lighting cannot be fixed in post. So even if you do not have professional equipment to work with, you still need to try to make the best out of what you have. Make sure you are not lighting the subject from behind, as they will seem dark, for example do not place your interviewee in front of a window. If you are lighting someone from the side, this might create a chiaroscuro effect -> lighting half their face and making the other half seem very dark. This can look nice for certain shots and photos butmust match the rest of your video’s aesthetic. Try to have them lit from both sides. Avoid artificial lights with a yellow tint. If you have access to natural light, this can be ideal, so try placing your interviewee next to a window, as long as the light doesn’t create shadows on their face.
Framing
Rule of thirds
This is a guideline to framing in film, which claims an image should be imagined as divided into 9 equal parts, as if there are 2 horizontal and 2 vertical lines across it, and the main focus of the video should be placed along these lines or their intersections.
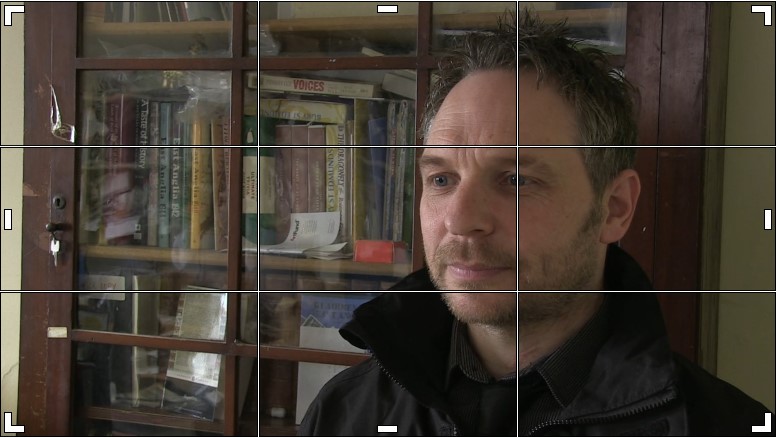
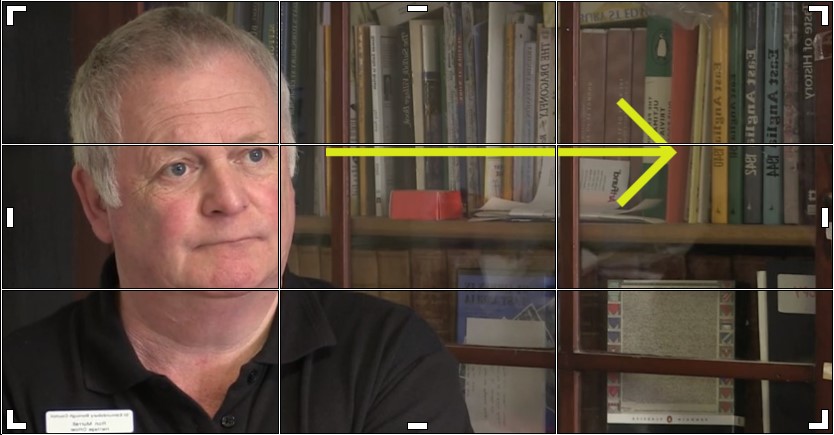
Make sure your interviewee is framed on either of the vertical lines and looking across the frame at the interviewer (as shown by he arrow in the photo below). The subject’s eyes should be aligned with the upper horizontal line.
Mise en scène (scenery, props etc.)
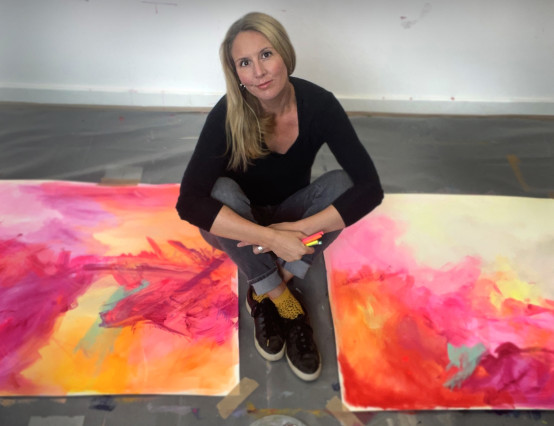
Make sure to keep the background simple, any items showing should either be relevant to the topic or to the person (e.g. if you are interviewing a photographer or painter, having some of their work in the background). Avoid filming an interview in front of a plain white wall, but also in front of a busy distracting background, try to find a good balance that catches the viewer’s attention without taking it away from the person speaking. If you are filming outdoors, keep an eye out for any signs that should not appear in your video (this could also be something spray painted on a wall, anything distracting or inappropriate).
Sound
Always make sure your sound is recording properly before you begin an interview, take some test shots, ask some warm up questions (e.g. ‘What’s your name?’ ‘Where are you from?’) and then listen back to it before you start. Warm up questions can also help make the interviewee comfortable.
Throughout the entire recording you need to pay close attention to your surroundings for potential noises. If you have someone helping you out, ask them to listen out for anything that might be heard in the recording. Even if you are not sure it was loud enough to reach the microphone, re-record the last part just in case.
General View Shots (GV) Also known as B-Roll or Cutaways
This term describes any footage intercut with the main shot. For example, if you are showing an interview, the GV is any footage used other than the interviewee speaking. Make sure to film plenty of this kind of footage, if you are interviewing an artist this could be footage of their work, if you are interviewing an expert on a historical event or location, gather footage on those, by both filming artifacts, museum exhibitions, the location as it is today, but also potentially using archive footage. Of course, if you are going to use found footage, make sure it is copyright free.
Interviews
Try not to intervene or interrupt your interviewee while they are speaking, so you have a fully usable audio / video. To engage with them try to nod along but avoid interjections such as “yeah” or “sure” during their answers.
If you are not including yourself in the final video, ask the interviewee to repeat your question in the beginning of their answers. For example: “When did you begin working on this project?” “I began working on this project in April” instead of just “In April”. This also means only asking open ended questions, nothing that can be answered with yes or no. Pay attention to whether they’re doing this, if they forget just remind them and ask them nicely to repeat their answer.
Do not give your opinion and stay impartial during your interviews.
If you are using audio recording equipment, avoidshowing it on the video. For example, if you are using a lapel mic, it is ok for the mic to show but ask them to put the wire under their shirt.
If you are recording without proper audio recording equipment try to be indoors and in a quiet place with as little background noise as possible.
Leave 10 seconds of silence at the beginning and the end of your recording to avoid cutting someone off and abrupt transitions in editing.
When editing, allow each answer to reach its conclusion before moving onto the next, avoid abrupt cuts that can be confusing for the viewer. Remember, you can change the order you show the answers in, but not the context. Avoid editing the answers in an order which affects the context, logic or grammar of the response.
Glossary
| Term | Definition |
|---|---|
| Audio Clipping | The distortion caused by speaking too loudly into a microphone. If you record your audio with this distortion you will not be able to fix it in post. Certain devices and audio editing software will visually represent your sound through volume bars, if the bar is green your audio is fine, if it reaches red it means it is clipping. Try to make your sound reach -12db on average. |
| GV/B-Roll/Cutaways | Supplemental or alternative footage to intercut with the main footage. The A-Roll would be the main footage.You should use it to complement and make your video more dynamic. It can also help the viewer visualise the topic being discussed. |
| Colour Correcting | Adjust the colour of your image so it looks natural, or so all your clips match. |
| Colour Grading | Process of enhancing the image of your video or photo by changing its colour, saturation, and contrast. By colour grading your footage you can create different environments and moods. |
| Import | Upload your raw files (audio, video, photography) to your editing project. |
| Export | Saving your final edit as an individual video file. This is different to saving your project. If you simply save your project, you will not have a final edited video but a “work in progress” which you will only be able to access in your editing software. You cannot view your project as a normal video unless you export it in a video format. |
| Fade In | Video: when the video appears gradually from darkness. Audio: when the audio’s volume gradually increases from silence. |
| Fade Out | Video: when the video disappears gradually to darkness. Audio: when the audio’s volume gradually decreases to silence. |
| Miseen scène | Anything appearing in the shot apart from the people, including scenery, props, and set. |
| Bin | A folder used to organize your files while editing. For example, if you record your audio and your video separately you should create a bin where you keep all of your audio and another one for all of your video footage so you know where to find your material. |
| Exposure | The amount of light you let in through your camera lens. Too much or too little exposure will affect the quality of your image. With too much light your image will be too bright and over-exposed. With too little light your image will be too dark and under-exposed. |
| Over-exposed | When your image is distorted due to too much light, making it appear white. When over-exposed, part of your image will not contain any usable information. |
| Transitions | How you move from one clip to another. You can make both audio and/or video transitions. Dissolves and crossfades are examples of possible transitions. |
| Trim | Shorten your clips from either their beginning or ending. |
| Split / Blade | To cut your audio or video file in half, creating 2 different clips. |
| Levels | Audio levels are the intensity of your audio clips, their volume. When adjusting the audio levels you are balancing the volume of the different audio clips or adjusting the volume within the same clip. For instance, if in one of your audio clips an interviewee starts speaking very enthusiastically and gradually quiets down, you will want to level down the intensity of their speech throughout the clip. |
| Keyframe | A keyframe is a turning point within a clip. It is a frame that marks either the beginning or the end of a transition. For example, in a fade in, the points where the fade starts and ends are key frames since they represent the beginning and the ending of that transition. |


0 Comments